How to Upload Iso to Domain in Ovirt 4.2 Webgui
Ovirt HyperConverged InAir-Gapped Environment
TurnToJPG -->
Feb 14, 2020
Technology
0. AIM
For deploying Ovirt HyperConverged in air-gapped environment.
For some companies, their inner environment is air-gapped, eastward.chiliad OA network. In such air-gapped environment we could only use ISO and take some packages in cd-roms for taking into their intra-network. How to deploy a ovirt drivened individual deject in air-gapped room, I will accept some experiment and try the solution out.
1. Surround
In this chapter the environs volition exist available for ovirt deployment with glusterfs.
ane.one Hardware
I apply my home machine for building the environment, the hardware is listed as:
CPU: Intel(R) Core(TM) i5-4460 CPU @ iii.20GHz Memory: DDR3 1600 32G Disk: 1T HDD. 1.two OS/Networking/Software
My home car runs ArchLinux, with nested virtualization.
Use qemu and virt-manager for setting the environment.
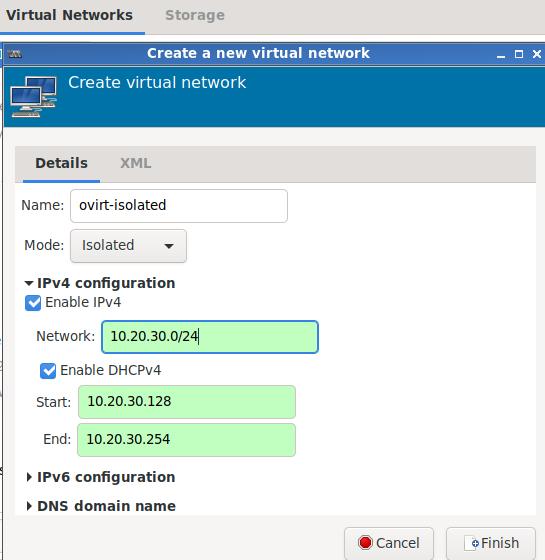
# qemu-system-x86_64 --version QEMU emulator version 4.two.0 Copyright (c) 2003-2019 Fabrice Bellard and the QEMU Projection developers # virt-managing director --version 2.2.1 I setup a isolated networking in virt-manager, cidr is 10.20.30.0/24, iii vms will use this isolated networking for emulating the air-gapped environment, its proper noun is ovirt-isolated:
ane.3 VMs Preparation
I utilise 3 vms for setting up the surround, each of them take:
2 vcpus 10240 MB retentiveness vda: 100 GB, for installing the system. vdb: 300 GB, for setting upward the storage network. NIC: 1x, attached to ovirt-isolated networking. hostname - IP is listed equally following:
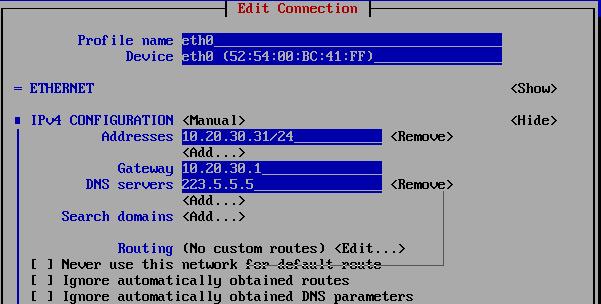
instance1.com 10.xx.xxx.31 instance2.com 10.20.30.32 instance3.com 10.20.30.33 engineinstance.com 10.20.xxx.34 For setting upward the ip address, use nmtui in terminal, take instance1.com for example:
For setting upward the hostname, besides apply nmtui:

Login to each automobile and enable the password-less login, have instance1 for example:
# ssh-keygen # vim /etc/hosts 127.0.0.1 localhost localhost.localdomain localhost4 localhost4.localdomain4 ::one localhost localhost.localdomain localhost6 localhost6.localdomain6 ten.20.xxx.31 instance1.com 10.20.thirty.32 instance2.com 10.20.30.33 instance3.com 10.20.xxx.34 engineinstance.com # ssh-copy-id root@instance1.com # ssh-copy-id root@instance2.com # ssh-re-create-id root@instance3.com Likewise add following items(engine vm's hostname and ip address) into host motorcar(archLinux)'s /etc/hosts:
10.20.xxx.31 instance1.com ten.20.30.32 instance2.com 10.20.30.33 instance3.com 10.20.30.34 engineinstance.com 2. Deploy Glusterfs
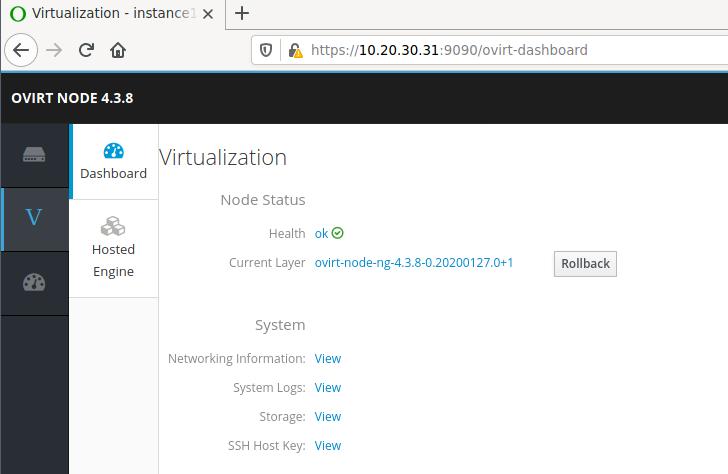
Use firefox for visiting https://10.xx.30.31:9090:

use root for login, enter the instance1.com's cockpit web:
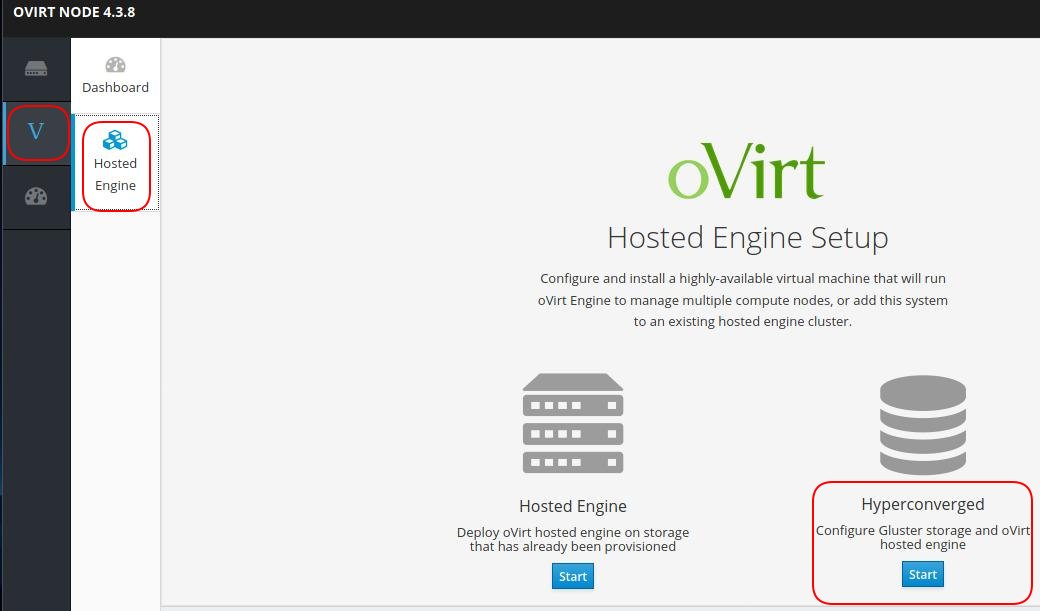
Click V->Hosted Engine, and so click the start button under Hyperconverged:
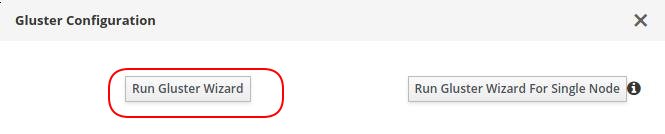
Click Run Gluster Wizard:
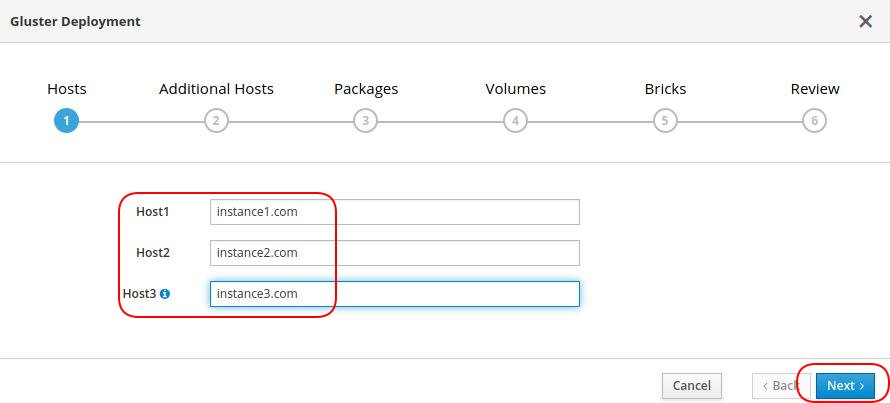
Fill in iii nodes's hostname, click side by side:
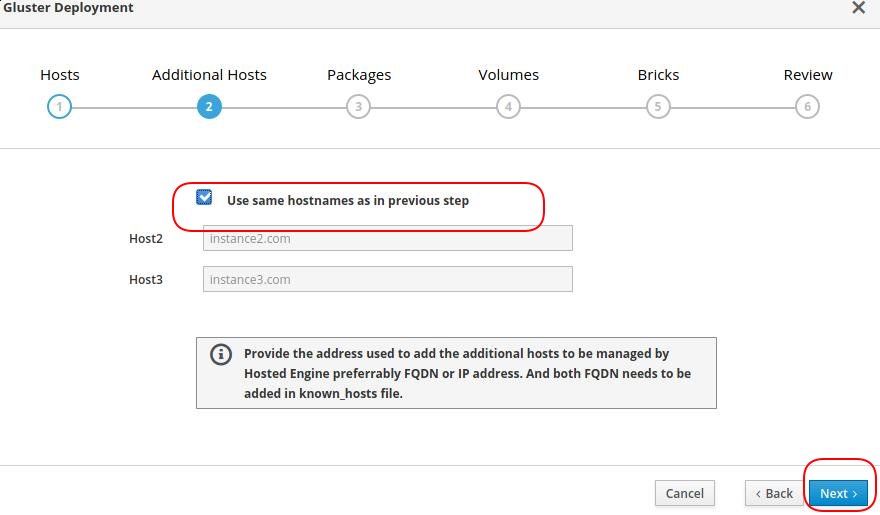
In Additional Hosts, click Utilize aforementioned hostnames as in previous footstep, thus Host2 and Hosts3 volition be added automatically:
In Packages we keep the default empty items and click next for continue.
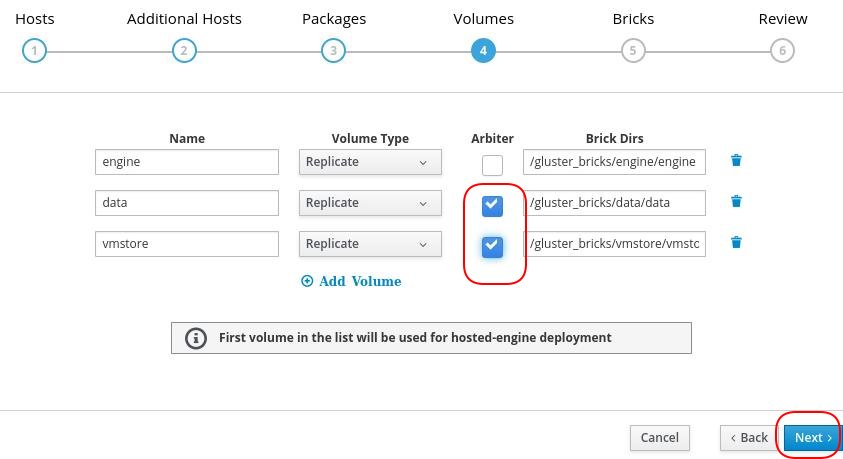
Continue the default volumn setting, and enable the Arbiter for data and vmstore:
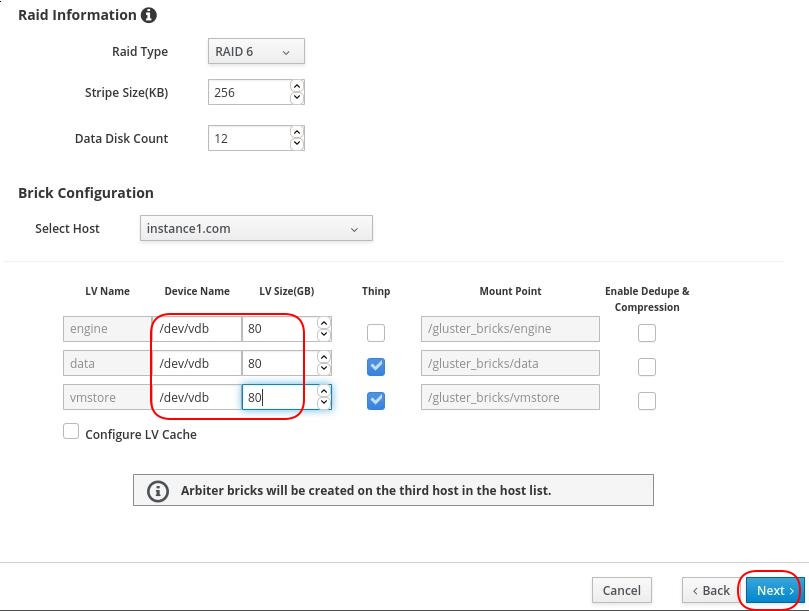
Here we arrange the LV device name to vdb, and adjust the size equally 80,80,80, click next for keep:
The volume size for running engine vm should exist at least 58GB(ovirt default minimum size, really takes more than this number. )
Review and click deploy:
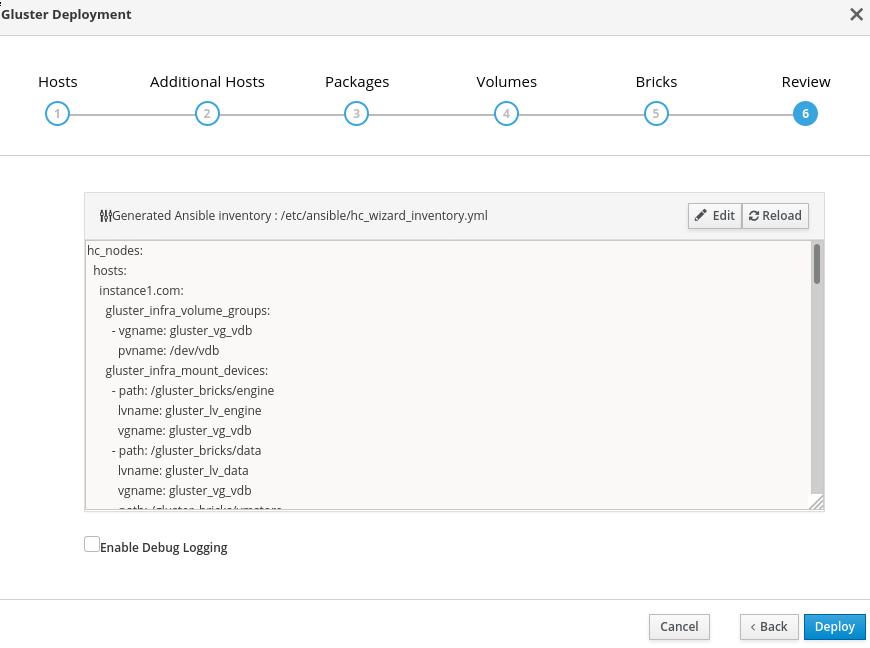
The ansible tasks volition run until you run into this hint:
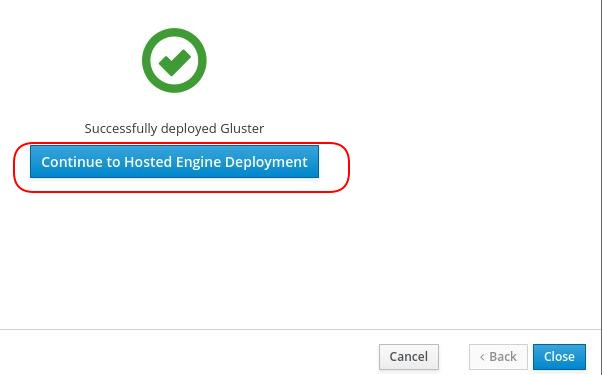
Click Continue to hosted engine deployment to continue.
3. Hosted Engine
Earlier keep, manually install the rpms in instance1.com:
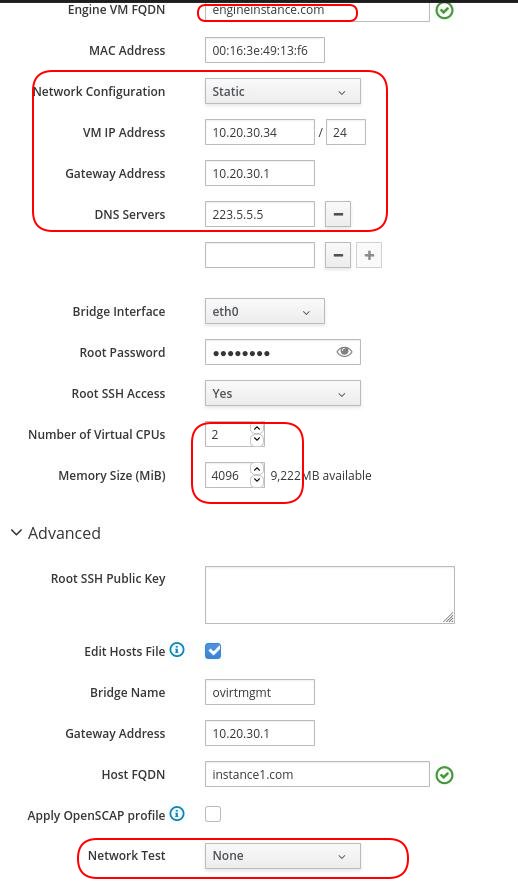
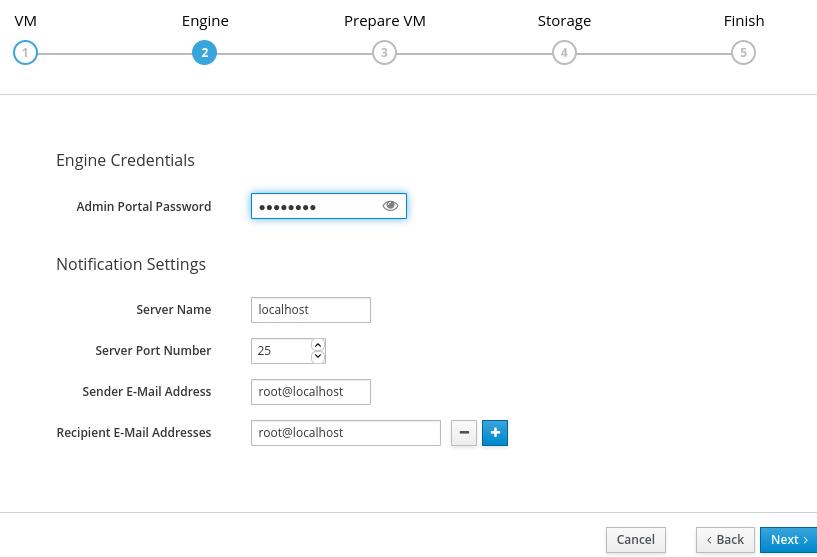
# yum install -y ./ovirt-engine-appliance-4.3-20200127.ane.el7.x86_64.rpm # rpm -qa | grep ovirt-engine-appliance ovirt-engine-appliance-4.3-20200127.i.el7.x86_64 Fill the engine vm's configuration infos:
Make full in admin portal countersign(this password will be used in web login) and continue:
Examine the configuration and click Prepare VM:
Wait for about half an hour to see deployment successful:

Keep the default configuration:
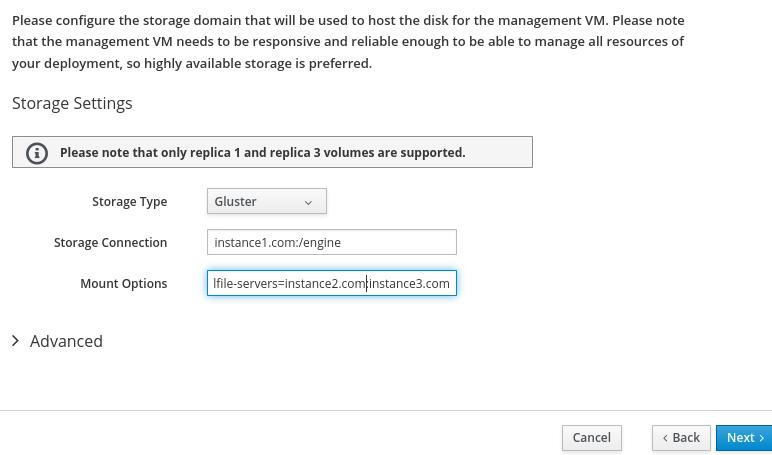
engine vm'due south storage configuration volition use Gluster, path will be Gluster'south engine volumn, and its parameter is:
backup-volfile-servers=instance2.com:instance3.com
for preventing the unmarried-node issue for Gluster.
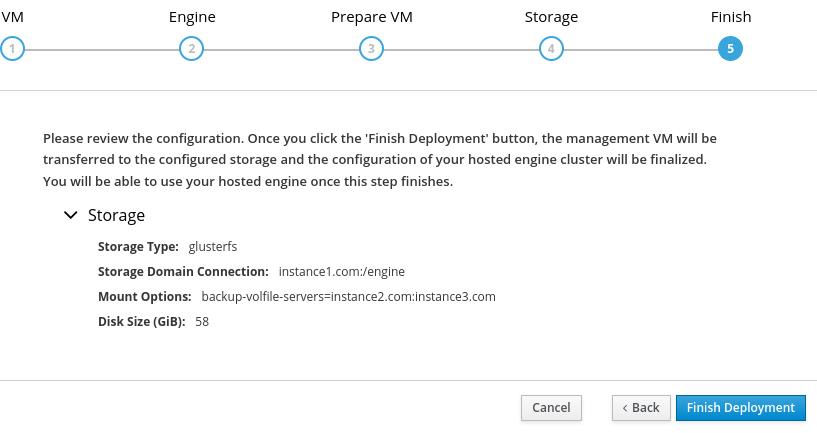
Click Finish deployment, and look for a break:
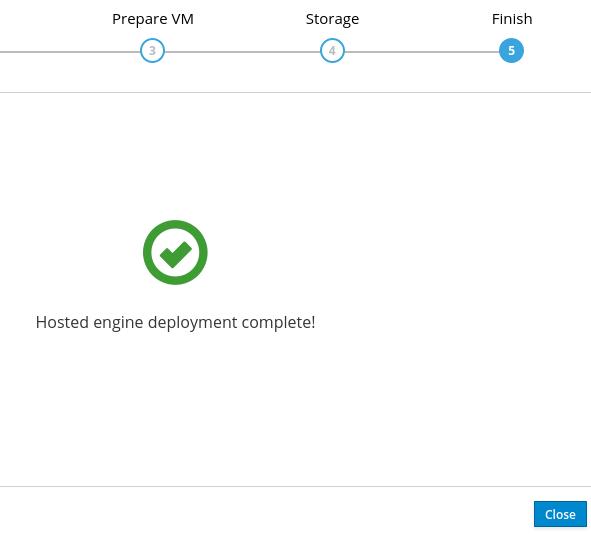
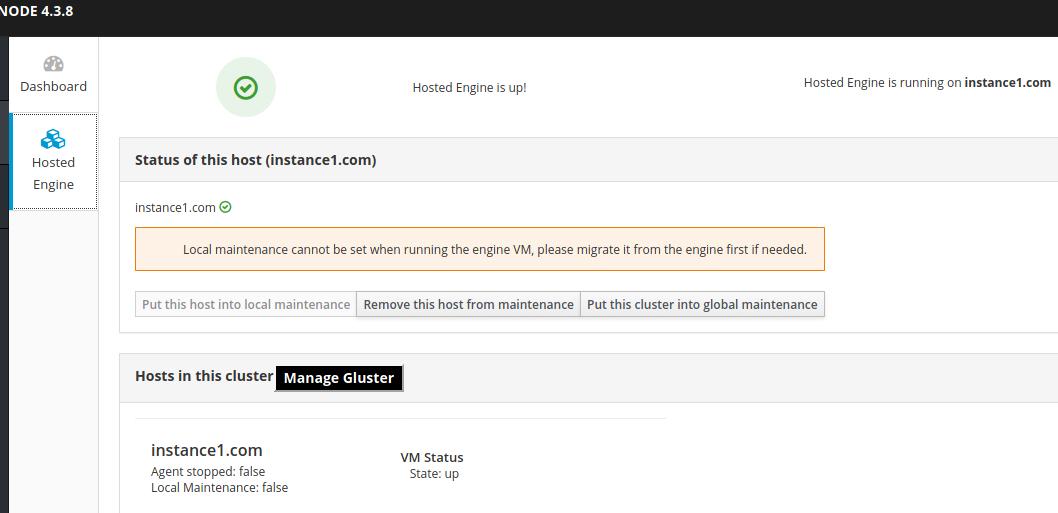
Seeing this means deploy succeeded:
Refresh the status:
4. Portal
Visit engineinstance.com in host machine(ArchLinux):
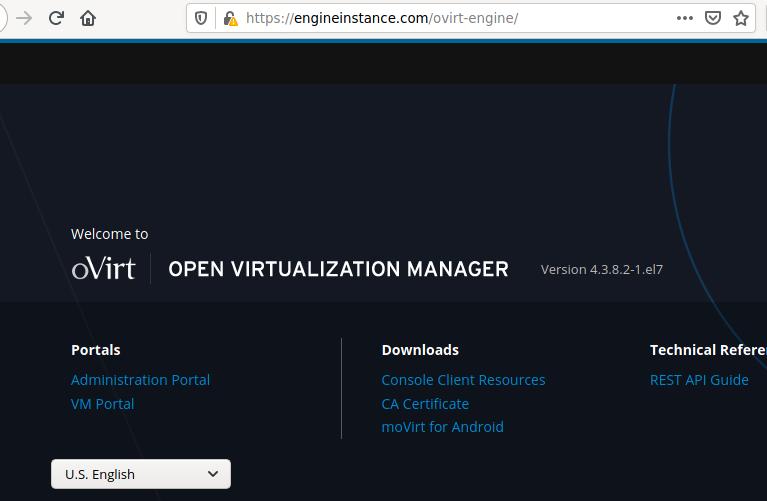
Click Administration Portal:
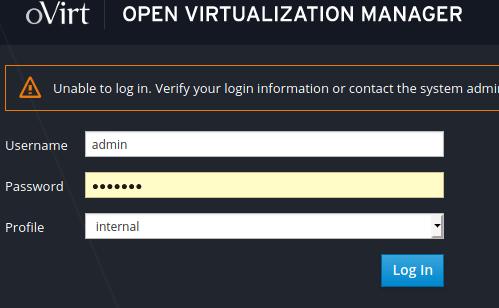
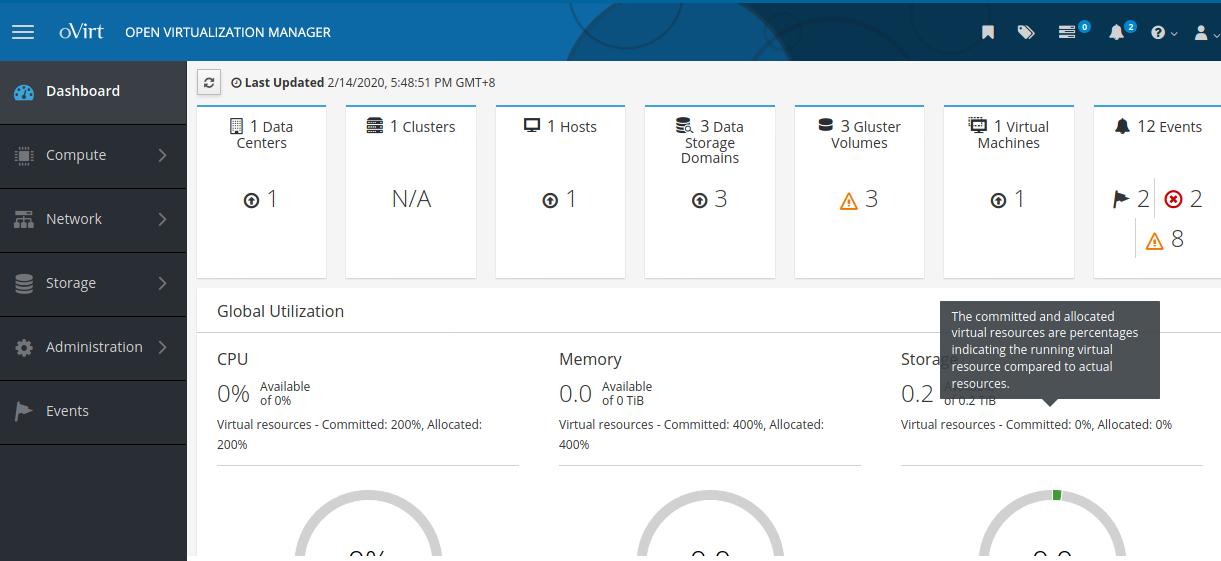
admin page is like post-obit:
ssh into engine vm and check the deejay partitions:
# ssh root@x.20.30.34 root@10.20.thirty.34'southward countersign: Final login: Fri Feb xiv 17:25:51 2020 from 192.168.i.ane [root@engineinstance ~]#df -h Filesystem Size Used Avail Use% Mounted on devtmpfs 1.9G 0 1.9G 0% /dev tmpfs 1.9G 12K one.9G ane% /dev/shm tmpfs one.9G eight.9M 1.9G 1% /run tmpfs i.9G 0 i.9G 0% /sys/fs/cgroup /dev/mapper/ovirt-root 8.0G ii.3G v.8G 29% / /dev/mapper/ovirt-home 1014M 33M 982M 4% /dwelling house /dev/mapper/ovirt-tmp 2.0G 33M ii.0G 2% /tmp /dev/mapper/ovirt-var 20G 437M 20G 3% /var /dev/vda1 1014M 157M 858M 16% /boot /dev/mapper/ovirt-log 10G 45M 10G 1% /var/log /dev/mapper/ovirt-inspect 1014M 34M 981M 4% /var/log/audit tmpfs 379M 0 379M 0% /run/user/0 5. Create The First VM
5.1 Add ISO storage Domain
Login in to instance1.com, configure nfs share storage for holding ISO images:
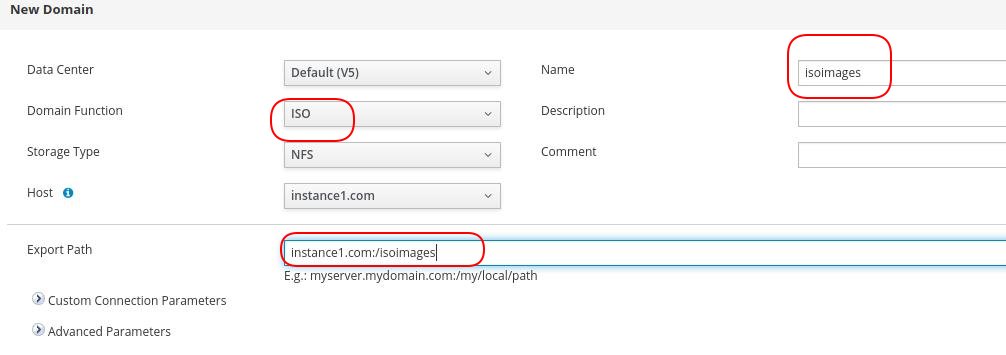
[root@instance1 ]# mkdir -p /isoimages [root@instance1 ]# chown 36:36 -R /isoimages/ [root@instance1 ]# chmod 0755 -R /isoimages/ [root@instance1 ]# vi /etc/exports [root@instance1 ]# true cat /etc/exports /isoimages *(rw,sync,no_subtree_check,all_squash,anonuid=36,anongid=36) [root@instance1 ]# systemctl enable --now nfs.service Created symlink from /etc/systemd/arrangement/multi-user.target.wants/nfs-server.service to /usr/lib/systemd/system/nfs-server.service. In ovirt manager portal , click Storage->Storage Domain, click New Domain:

Fill in proper name and path information:
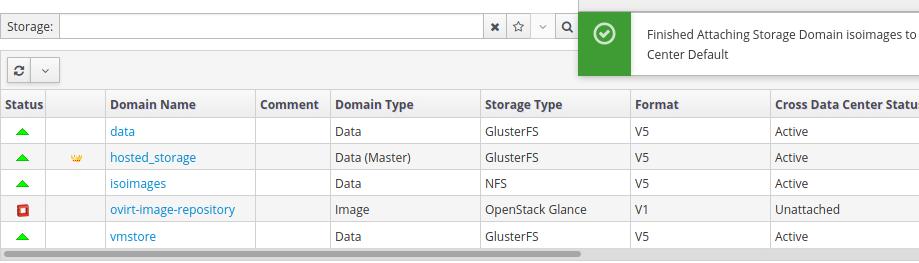
Finished adding isoimages:
v.two Upload iso
Login to engien vm(engineinstance.com), download the iso from official site, we take ubuntu16.04.6 for example:
[root@engineinstance ~]# ovirt-iso-uploader -i isoimages upload ./ubuntu-16.04.6-server-amd64.iso Please provide the REST API countersign for the admin@internal oVirt Engine user (CTRL+D to abort): Uploading, please look... INFO: Start uploading ./ubuntu-16.04.half dozen-server-amd64.iso Uploading: [########################################] 100% INFO: ./ubuntu-16.04.6-server-amd64.iso uploaded successfully 5.3 Create VM
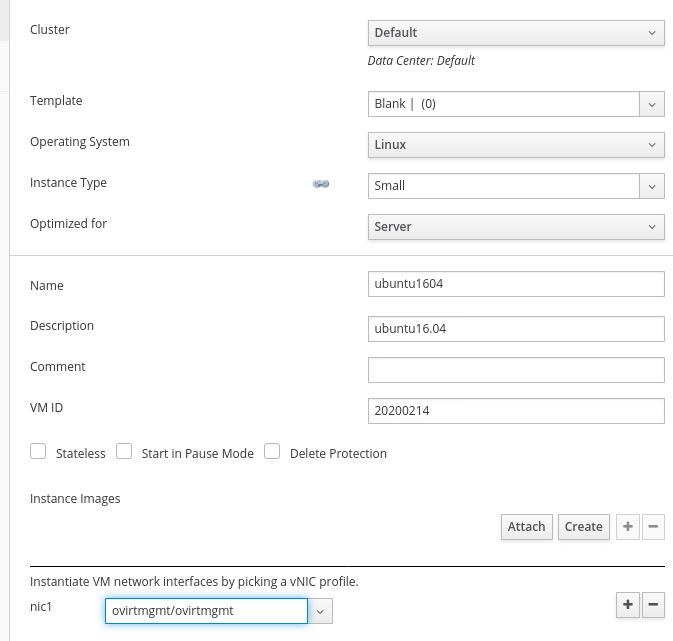
Compute-> Virtual Machines, click new button:
 Fill in informations:
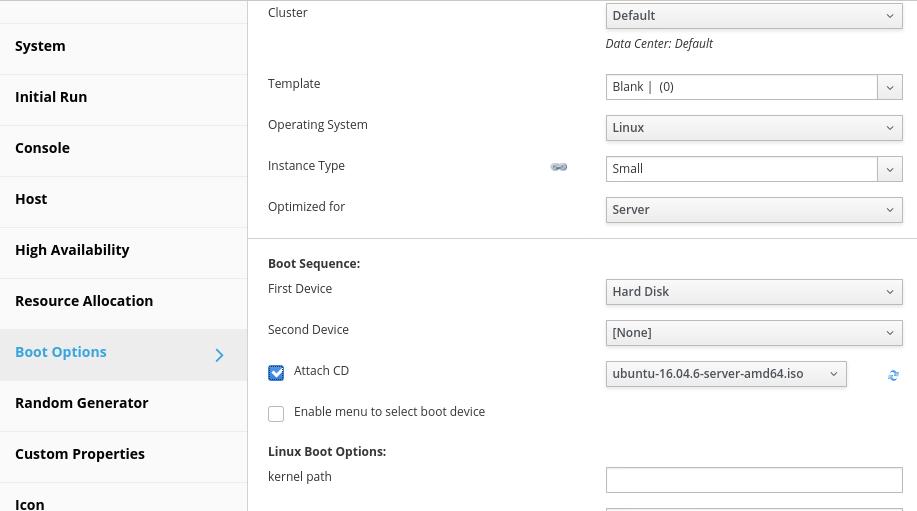
Click advanced options, select Kicking Options, then adhere uploaded iso:
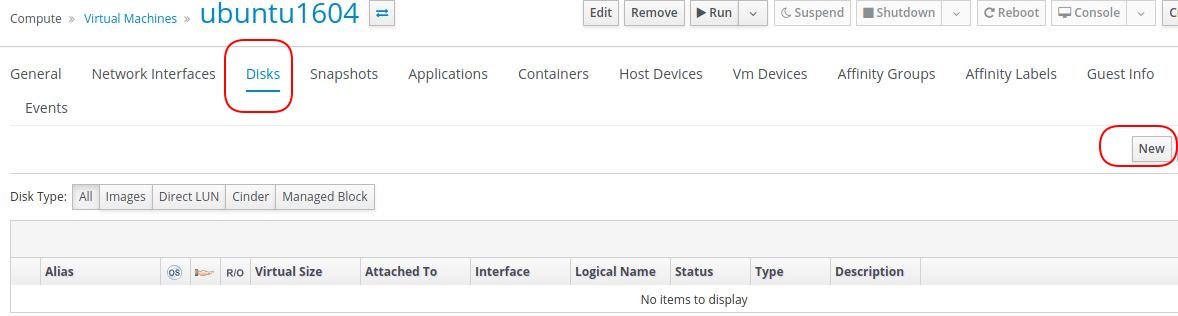
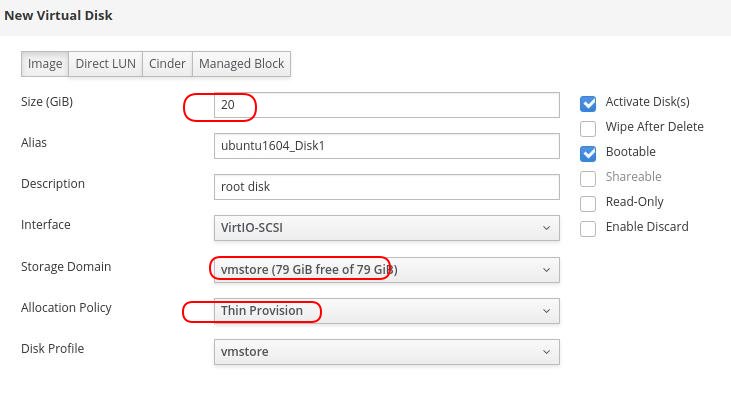
Click Disks, then click new:
Fill in options:
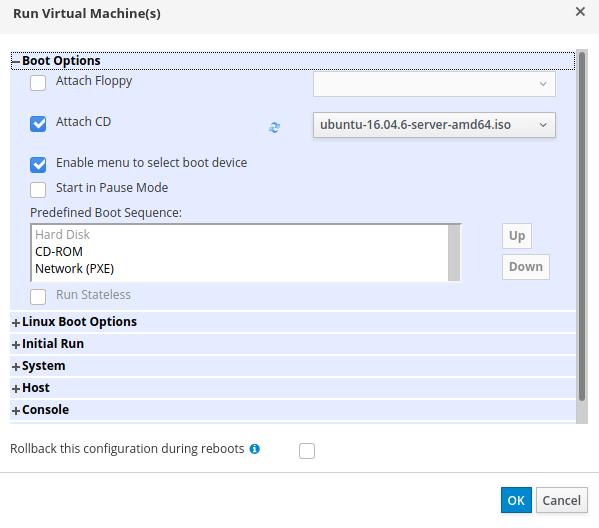
Click this new machine, and select run->run in one case:

Click OK for installation:
The installation image will exist shown:
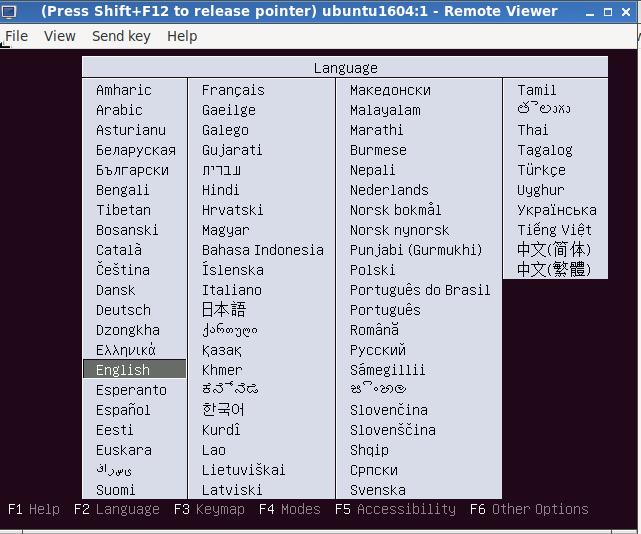
Configure installation options and await until installation finished.
Since we use nested virtualization, the installation step volition take a very long time(>1h) for installing the os. For speedup, considering utilise NVME ssd for locating the vm's qcow2 files. Or use iii concrete servers.
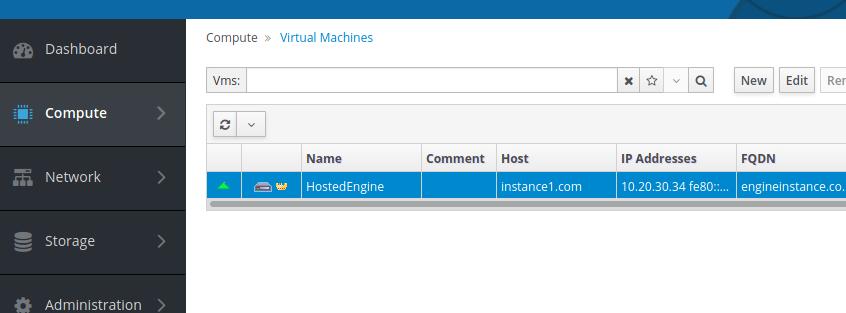
On vm portal we could run across our newly created vm:
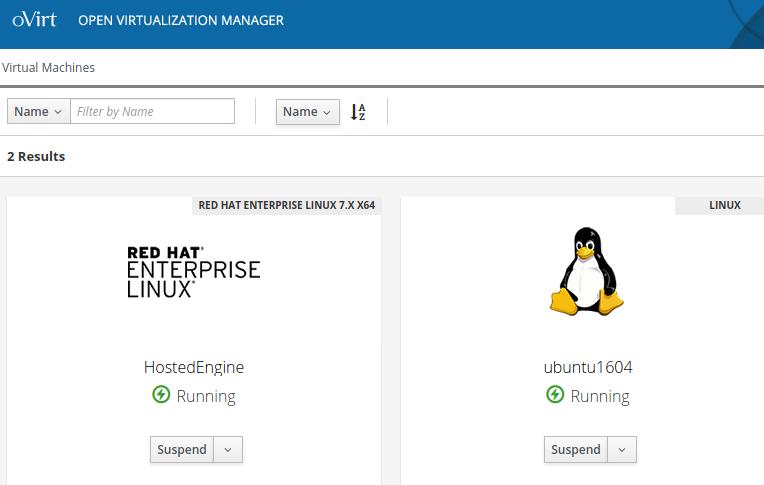
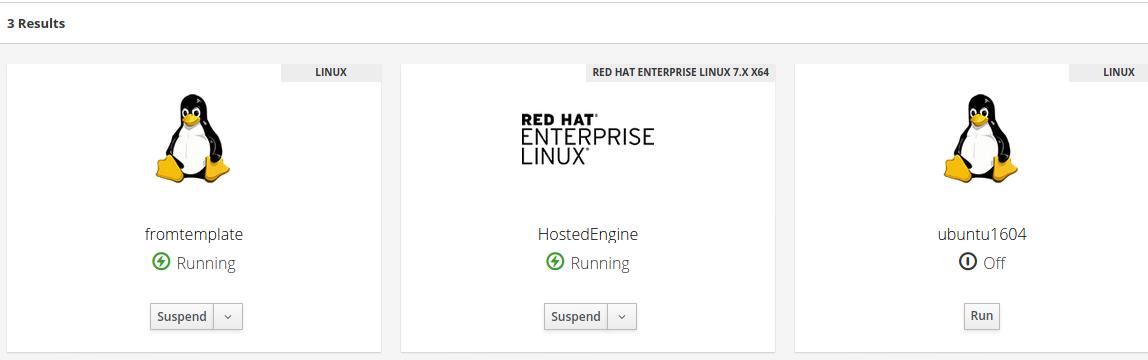
Examine the vms on instance1.com:
[root@instance1 isoimages]# virsh -r list Id Name State ---------------------------------------------------- two HostedEngine running 4 ubuntu1604 running 6. Create vm using template
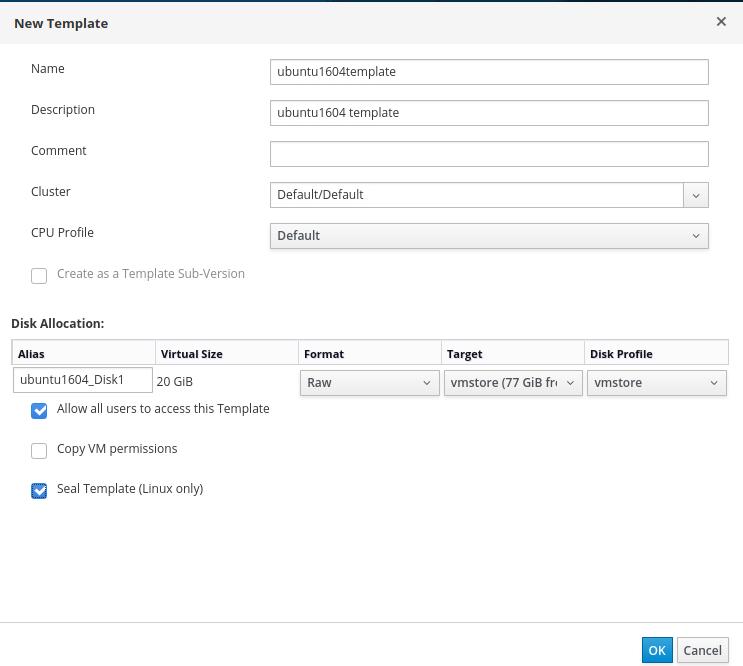
vi.one Create template
Create template via:
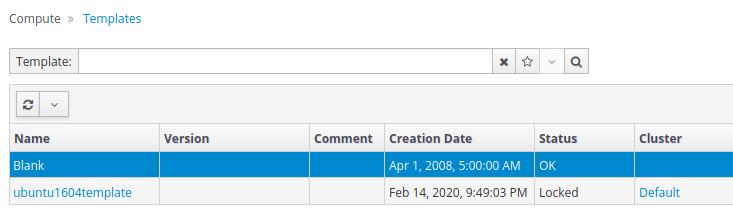
Check the status of template:
6.2 Create vm
Create new vm using template:
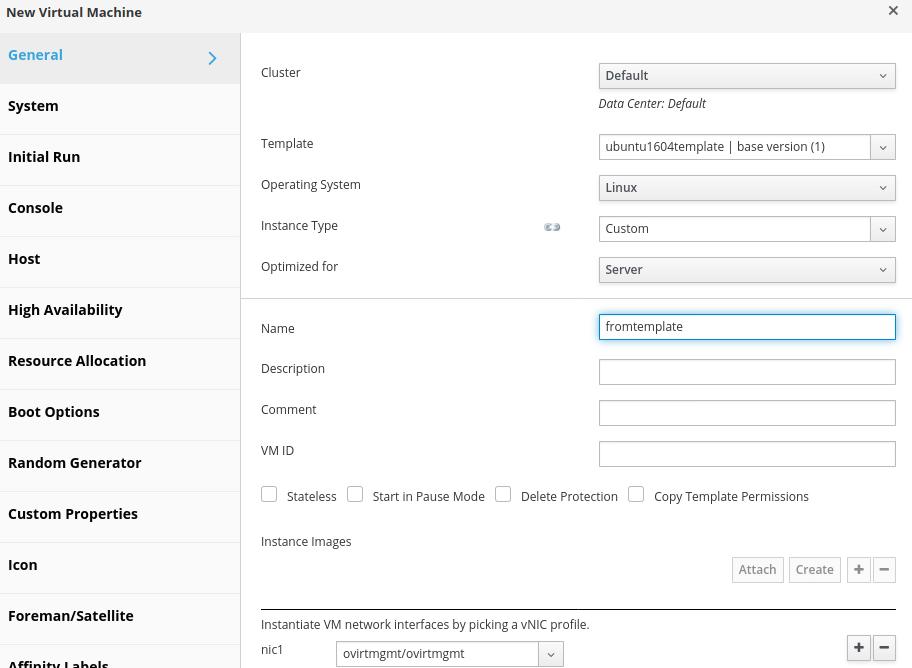
Start the machine and check result:
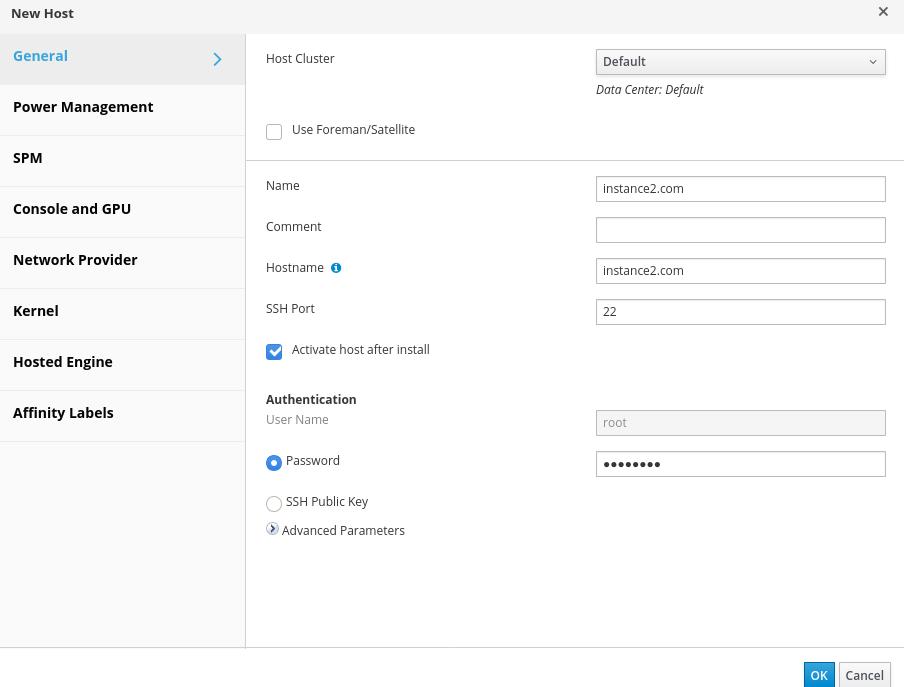
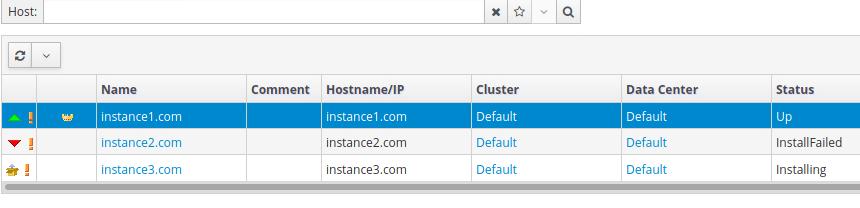
7. Add together hosts
In engine vm, add following items:
Then we add hosts of instance2.com and instance3.com:
Upshot:
Source: https://purplepalmdash.github.io/blog/2020/02/14/ovirt-hyperconverged-inair-gapped-environment/
Post a Comment for "How to Upload Iso to Domain in Ovirt 4.2 Webgui"